Day-to-day development tasks
This page describes how to perform day-to-day development tasks on the PickCells source code.
Contents
- Using Maven
- Getting started
- Common Maven commands
- Validate project
- Compile source code
- Compile and run tests
- Package project
- Verify project
- Install into local repository
- Deploy package to remote repository
- Remove build artifacts
- View Maven dependencies
- Create a test report
- Create JavaDoc
- Check coding style using Checkstyle
- Check code coverage using Jacoco
- Check test coverage using Cobertura
- Using continuous integration
- Browse PickCells JavaDoc
- Using Git and Framagit
- Using Maven and the Git JGit-Flow Plugin
Using Maven
Getting started
See Maven in 5 Minutes.
Common Maven commands
A summary of common Maven commands can be found at Introduction to the Build Lifecycle. A few of the most useful ones are below.
Validate project
To validate that a project is correct and all necessary information is available, run:
mvn validate
Compile source code
To compile source code, run:
mvn compile
Compiled code is put into target/classes/.
Compile and run tests
To compile and run tests, run:
mvn test
Compiled tests are put into target/test-classes/ and test reports into target/surefire-reports.
Package project
To package a project e.g. into a jar or zip file, run:
mvn package
The package is put into target/, e.g. target/foundationj-datamodel-0.7.0.jar or target/PickCells-0.7.0.zip.
Verify project
To check the results of integration tests, run:
mvn verify
Install into local repository
To install a package into the local Maven repository, run:
mvn install
By default, the local Maven repository is located in:
- Ubuntu users:
~/.m2/repository - Windows users:
%USERPROFILE%\.m2\repository
Deploy package to remote repository
For authorised users only, to deploy a package to a remote repository, run:
mvn deploy
Remove build artifacts
To remove the target/ directory, run:
mvn clean
View Maven dependencies
To view a Maven dependency tree, using the Apache Maven Dependency Plugin:
-
Run:
mvn dependency:tree -
You should see something like:
...
[INFO] ------------------------------------------------------------------------
[INFO] Building foundationj-datamodel 0.7.0
[INFO] ------------------------------------------------------------------------
[INFO]
[INFO] --- maven-dependency-plugin:2.8:tree (default-cli) @ foundationj-datamodel ---
[INFO] org.pickcellslab.foundationj:foundationj-datamodel:jar:0.7.0
[INFO] +- org.apache.commons:commons-math3:jar:3.4.1:compile
[INFO] +- com.fathzer:javaluator:jar:3.0.0:compile
[INFO] +- org.slf4j:slf4j-log4j12:jar:1.7.7:compile
[INFO] |  +- org.slf4j:slf4j-api:jar:1.7.7:compile
[INFO] |  \- log4j:log4j:jar:1.2.17:compile
[INFO] +- junit:junit:jar:4.11:test
[INFO] |  \- org.hamcrest:hamcrest-core:jar:1.3:test
[INFO] \- com.carrotsearch:junit-benchmarks:jar:0.2.1:test
...
To create a plain-text GraphViz dot directed graph file, dependencies.dot, with the dependency tree, run:
mvn dependency:tree -DoutputType=dot -DoutputFile=dependencies.dot
To convert a dot file to an image file, using GraphViz’s dot command, run, for example:
$ dot -Tpng dependencies.dot -o dependencies.png
Create a test report
To create an HTML test report, using the Maven Surefire Report Plugin, run:
mvn surefire-report:report
Reports are created in target/surefire-reports/ and an HTML version in target/site/surefire-report.html.
Create JavaDoc
To create JavaDoc, using the Apache Maven JavaDoc Plugin, run:
mvn javadoc:javadoc
JavaDoc is created in target/site/apidocs. The entry page for a web browser is index.html.
Check coding style using Checkstyle
Checkstyle is a style checker. It checks Java source code against a coding standard and can highlight issues relating to readability of the source code, its comments and JavaDoc, and certain design issues. See the Checkstyle web site for a list of default checks.
To run Checkstyle, using the Apache Maven Checkstyle Plugin, run:
mvn checkstyle:checkstyle
Checkstyle reports are created in target/ and an HTML version in target/site/checkstyle.html.
To pull together reports from multiple sub-projects, in their parent project, run:
mvn checkstyle:checkstyle-aggregate
Check code coverage using Jacoco
Jacoco is a code coverage library that identifies code that is executed as a side-effect of running tests. To create a code coverage report using its Maven Plug-in, run:
mvn org.jacoco:jacoco-maven-plugin:prepare-agent test org.jacoco:jacoco-maven-plugin:report
Code coverage reports are created in target/site/jacoco:
- HTML, the entry page for a web browser is
index.html. - XML,
jacoco.xml. - Comma-separated values,
jacoco.csv, for example:
GROUP	PACKAGE	CLASS	INSTRUCTION_MISSED	INSTRUCTION_COVERED	BRANCH_MISSED	BRANCH_COVERED	LINE_MISSED	LINE_COVERED	COMPLEXITY_MISSED	COMPLEXITY_COVERED	METHOD_MISSED	METHOD_COVERED
foundationj-dbm	org.pickcellslab.foundationj.dbm.queries.adapters	Updatable	42	0	2	0	8	0	4	0	3	0
foundationj-dbm	org.pickcellslab.foundationj.dbm.meta	MetaTargetedDataSet	399	0	30	0	76	0	30	0	15	0
foundationj-dbm	org.pickcellslab.foundationj.dbm.meta	Hideable	19	0	0	0	3	0	2	0	2	0
foundationj-dbm	org.pickcellslab.foundationj.dbm.meta	DimensionContainer.new Object() {...}	8	0	2	0	1	0	2	0	1	0
...
Check test coverage using Cobertura
Cobertura is another code coverage library. To create a code coverage report using its Maven Plug-in, run:
mvn cobertura:cobertura
HTML code coverage reports are created in target/site/cobertura. The entry page for a web browser is index.html.
Using continuous integration
Run test coverage using Cobertura
Cobertura results can be obtained by using GitLab Continuous Integration (GitLab CI).
To enable test coverage, edit .gitlab-ci.yml and add:
   test-ok:
  stage: test
  script:
    - mvn cobertura:cobertura
  artifacts:
    paths:
      - target/site/cobertura

  pages:
    artifacts:
      paths:
        - public
    only:
      - master
    dependencies:
      - test-ok
    script:
      - "mkdir public"
      - "cp -r  target/site/cobertura/* public"
    stage: deploy
The result can be seen viewed in a web browser.
Browse PickCells JavaDoc
See PickCells JavaDoc.
Using Git and Framagit
About the forking workflow
For an introduction to the “forking workflow” please see Managing multiple developers and version control in our page on Collaborative Development.
Get PickCells repositories
See Get PickCells repositories in Set up a PickCells development environment.
Use branches to develop features, enhancements or bug fixes
It is good practice to use branches to develop features, enhancements or bug fixes. An example of doing this is as follows.
-
In the clone of the repository on your local machine, create a new branch. See the Git Style Guide for naming conventions for branches.
git checkout -b some-new-feature -
Implement the changes, committing the changes regularly e.g.
git commit -a -m "Updated ..." -
Regularly push the changes in the branch to your remote fork on Framagit e.g.
git push origin some-new-featureYou can check the changes have been pushed by looking at your remote fork on Framagit at the URL
https://framagit.org/<YOUR-USER-NAME>/<REPOSITORY-NAME>e.g.https://framagit.org/jo12345/pickcells-assembly.
Use merge requests to request PickCells maintainers review and merge your branch
If you want your branch reviewed by the PickCells maintainers and added to the PickCells repositotries:
- Visit your remote fork on Framagit at the URL
https://framagit.org/<YOUR-USER-NAME>/<REPOSITORY-NAME>e.g.https://framagit.org/jo12345/pickcells-assembly. - Click “Create merge request” to create a “merge request” (also known as a “pull request”).
- In Title: enter a meaningful title.
- In Description: add additional information.
- In Source branch: select the branch in your repository you want to merge e.g.
some-new-feature. - In Target branchL: select the branch in the PickCells repository you want your branch to be merged into.
- Click “Submit merge request”.
Using Maven and the Git JGit-Flow Plugin
Git-flow is a wrapper around existing Git commands which can help to manage branching within Git. The Maven plugin ‘JGit-Flow’ supports Git-flow style versioning within Maven.
Install
Add the following configuration to a pom.xml file:
<build>
    <plugins>
        <plugin>
            <groupId>external.atlassian.jgitflow</groupId>
            <artifactId>jgitflow-maven-plugin</artifactId>
            <version>1.0-m5.1</version>
            <configuration>
                <!-- see goals wiki page for configuration options -->
            </configuration>
        </plugin>
    </plugins>
</build>
Additional plugin-specific configuration options are available.
Manage a release
Starting a release creates a release branch and updates POMs(s) with the release versions. To start a release, run:
mvn jgitflow:release-start
When a release branch is started the plugin prompts for the release version. e.g. if the development branch version is 5.1-SNAPSHOT it will assume that the release is 5.1 (though users can override this). This creates a release branch (e.g. release/rev-5.1) and pushes it to the origin` remote.
Finishing a release runs a Maven build (deploy or install), merges the release branch, and updates POMs(s) with development versions. To finish a release, run:
mvn jgitflow:release-finish
This builds, tags and merges the release branch back into the master and development branches. The plugin does the following:
- Builds and runs any tests.
- Creates a tag with the version number and a specified prefix: e.g.
ags/rev-5.1. - Updates the
masterbranch version, e.g. to5.1, for all parent projects and all it’s sub-modules. - Updates the
developmentbranch version to the next snapshot e.g.5.2-SNAPSHOT(though users can override this).
Manage a hotfix
Hotfix branches like release branches, except they are based on the master branch instead of the development branch.
Starting a hotfix creates a hotfix branch and updates POM(s) with hotfix versions. To start a hotfix, run:
mvn jgitflow:hotfix-start
This behaves in a similar way to mvn jgitflow:release-start but branches off of master.
Finishing a hotfix runs a Maven build (deploy or install), merges the hotfix branch, and updates POM(s) with previous versions. To finish a hotfix, run:
mvn jgitflow:hotfix-finish
This behaves in a similar way to mvn jgitflow:release-finish.
Work on a feature branch
starting a feature creates a feature branch. To start a feature branch, run:
mvn jgitflow:feature-start
This creates a new feature branch. It will prompt for the branch name which will take the format feature/<BRANCH-NAME>. The branch will be pushed to the origin remote automatically.
Finishing a feature merges the feature branch. To finish a feature, run:
mvn jgitflow:feature-finish
This merges a feature branch back into the development branch and pushes the updates to the origin remote.
Example
Create a new Maven project
-
Create a new Maven project called
my-app4.mvn archetype:generate -DgroupId=com.mycompany.app -DartifactId=my-app4 -DarchetypeArtifactId=maven-archetype-quickstart -DinteractiveMode=false -
Edit the newly-created POM file in
my-app4/pom.xml:<project xmlns="http://maven.apache.org/POM/4.0.0" xmlns:xsi="http://www.w3.org/2001/XMLSchema-instance" xsi:schemaLocation="http://maven.apache.org/POM/4.0.0 http://maven.apache.org/maven-v4_0_0.xsd"> <modelVersion>4.0.0</modelVersion> <groupId>com.mycompany.app</groupId> <artifactId>my-app4</artifactId> <packaging>jar</packaging> <version>1.2-SNAPSHOT</version> <name>my-app4</name> <url>http://maven.apache.org</url> <dependencies> <dependency> <groupId>junit</groupId> <artifactId>junit</artifactId> <version>3.8.1</version> <scope>test</scope> </dependency> </dependencies> <build> <plugins> <plugin> <groupId>external.atlassian.jgitflow</groupId> <artifactId>jgitflow-maven-plugin</artifactId> <version>1.0-m5.1</version> <configuration> <flowInitContext> <masterBranchName>master</masterBranchName> <developBranchName>development</developBranchName> <featureBranchPrefix>feature-</featureBranchPrefix> <releaseBranchPrefix>release-</releaseBranchPrefix> <hotfixBranchPrefix>hotfix-</hotfixBranchPrefix> <versionTagPrefix>version-</versionTagPrefix> </flowInitContext> <pushFeatures>true</pushFeatures> <pushReleases>true</pushReleases> <noReleaseBuild>true</noReleaseBuild> <allowSnapshots>true</allowSnapshots> <allowUntracked>true</allowUntracked> <enableSshAgent>true</enableSshAgent> <username>USERNAME</username> <password>PASSWORD</password> <squash>false</squash> <scmCommentPrefix>[RELEASE] </scmCommentPrefix> </configuration> </plugin> </plugins> </build> <distributionManagement> <repository> <id>mockup-releases</id> <url>https://archiva.pickcellslab.org/repository/mockup-releases/</url> </repository> <snapshotRepository> <id>mockup-snaphots</id> <url>https://archiva.pickcellslab.org/repository/mockup-snaphots/</url> </snapshotRepository> </distributionManagement> </project> -
Build the project:
mvn package -
Test the newly compiled and packaged JAR:
java -cp target/my-app4-1.0-SNAPSHOT.jar com.mycompany.app.AppYou should see:
Hello World!
Add the new project to a repository on Framagit
-
Log in to Framagit
-
Click “+” and select “New project”.
-
Enter Project name:
my-app4. -
Click “Create project”.
-
Add your local
my-app4project to Git and push to Framagit:git init git remote add origin git@framagit.org:<YOUR-USER-NAME>/my-app4.git git add . git commit -m "Initial commit" git push -u origin master
Use a feature branch
-
Start a branch called
feature-01:mvn jgitflow:feature-start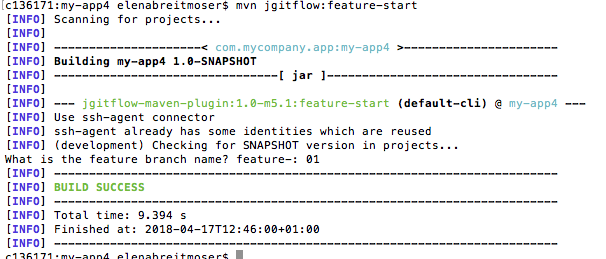
-
Check you are on branch
feature-01:git branch -
Create a new
README.mdin a text editor. -
Add and commit
README.md:git add README.md git commit -a -m "Added README.md" -
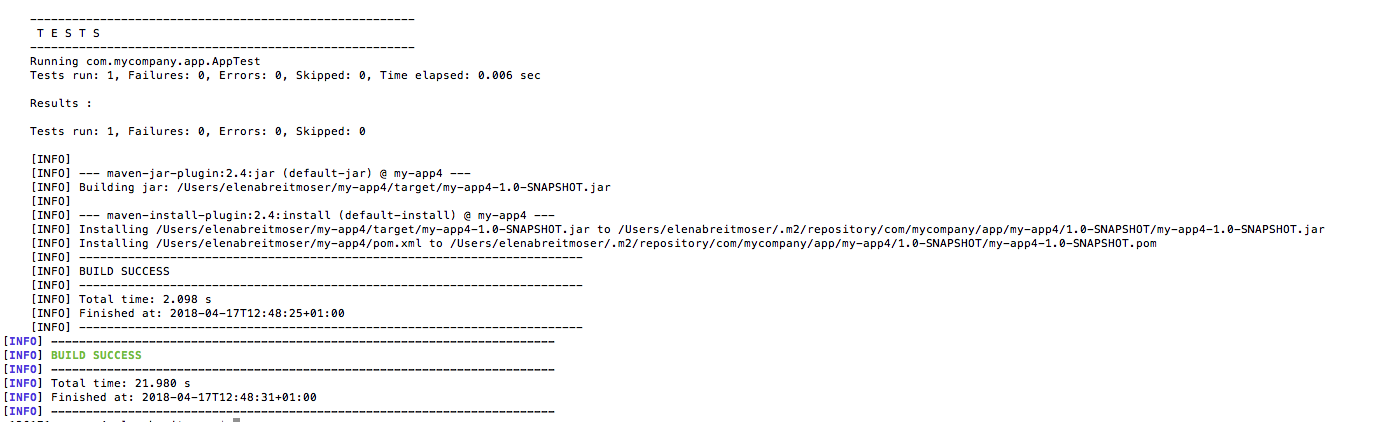
Finish the
feature-01branch:mvn jgitflow:feature-finishYou will see lots of output, ending with
-
Check you are back on the branch
development:git branch
Use a release branch
-
Start a release branch
mvn jgitflow:release-start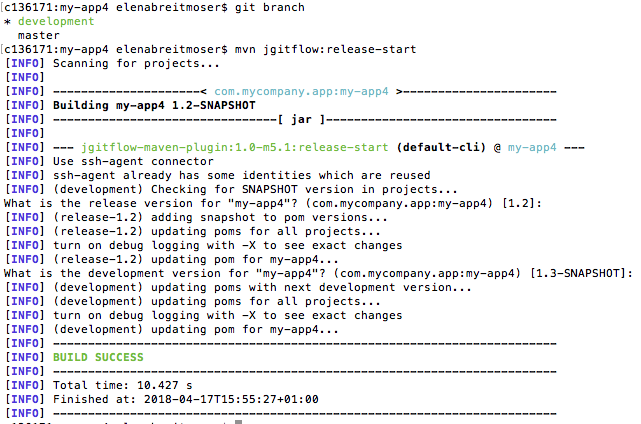
-
Using a text editor, add some more content to `README..
-
Commit changes to
README.md:git commit -m "Updated README.md" -
Finish the release branch:
mvn jgitflow:release-finish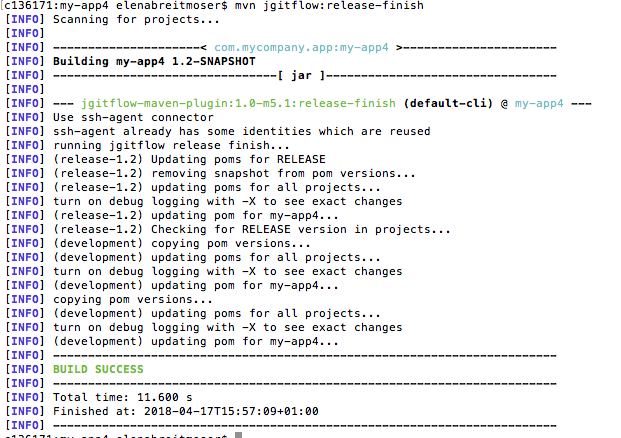
-
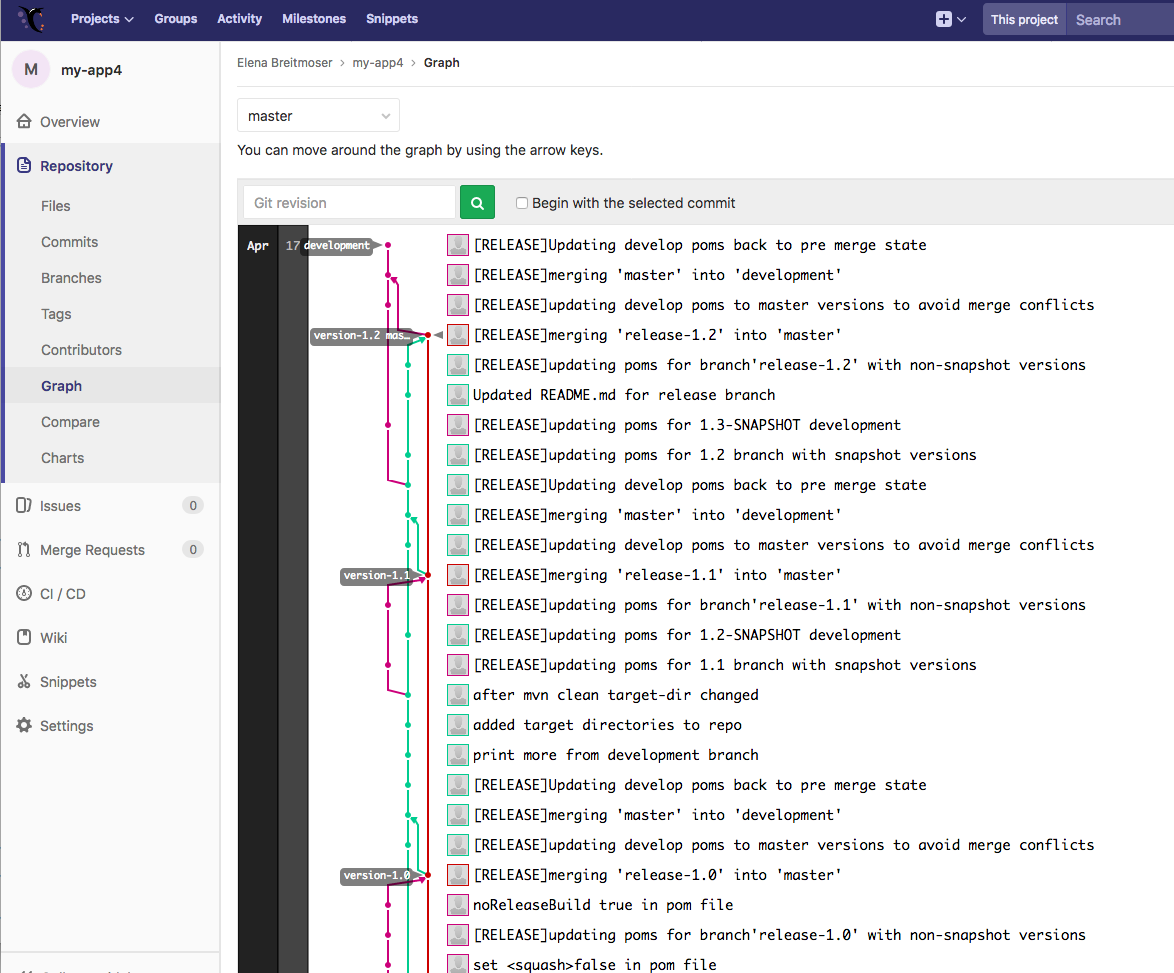
The top of the graph showing the branches over time should look something like the following:
Find out more
- Understanding Maven version Numbers
- Painless Maven project releases with Maven GitFlow Plugin
- Maven Git release